


What “without blur” usually means
Searchers often type phrases like “remove watermark from video without blur.” In practice, they are rejecting a familiar failure mode: tools that cover the watermark with a Gaussian blur or mosaic rectangle. That patch is easy to spot in playback—and it is not the same as rebuilding the background.
“Without a blur box” is a fair product expectation. “Zero blur on every frame forever” is not. Complex motion and semi-transparent marks can still leave slight repair marks after AI fill. Honest tools say both things.
Three common approaches
- Crop — Cut away the corner that holds the badge. Fast, but you lose frame composition (faces, captions, product shots).
- Blur / mosaic box — Soften or pixelate the marked region so the logo is less readable. The rectangle itself becomes the new visual problem.
- AI inpainting (pixel fill) — Rebuild pixels in the area you mark using surrounding context, aiming to keep the full frame without a stamped blur patch.
Blur box vs AI inpainting
This is the core distinction behind “without blur” searches. A blur tool covers the mark; AI inpainting tries to rebuild what was underneath.
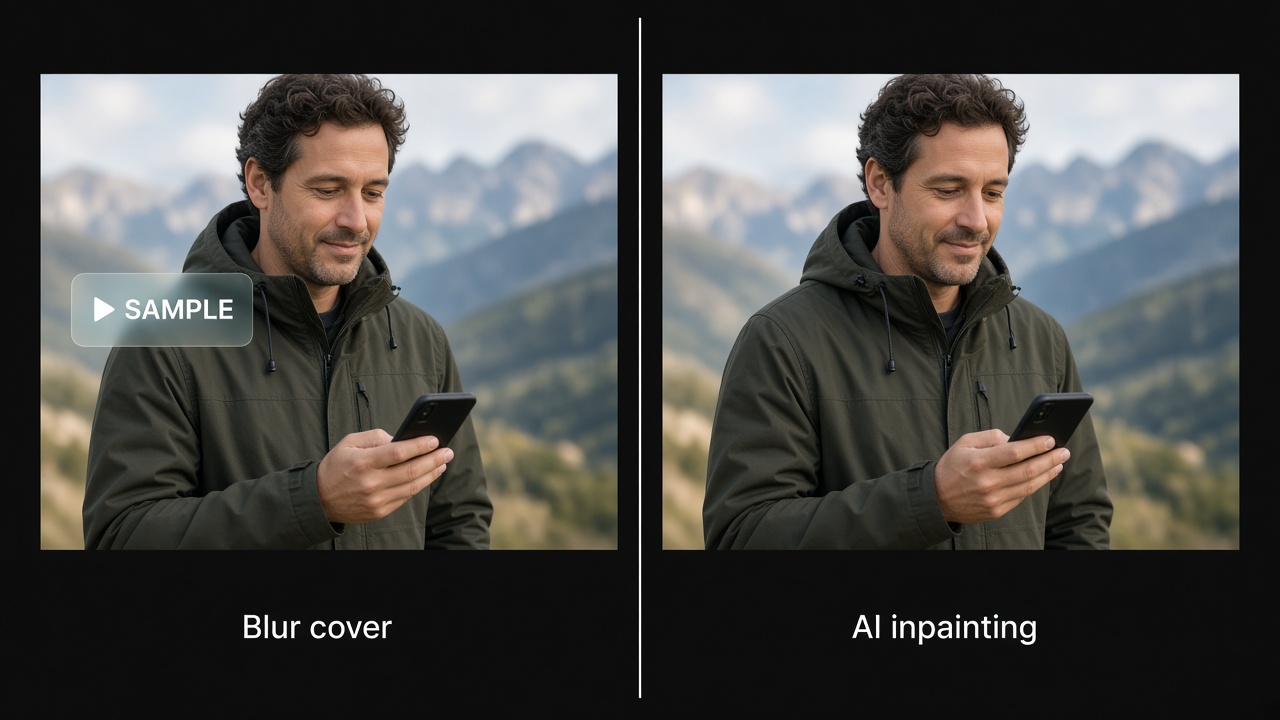
| Aspect | Blur / mosaic box | AI inpainting |
|---|---|---|
| What it does | Covers or smears the mark | Rebuilds pixels in the marked area |
| Typical look | Soft or mosaic rectangle | Closer to nearby background |
| Frame size | Usually keeps the frame | Keeps the frame (unlike crop) |
| When it fails | The blur patch is obvious | Slight repair marks, flicker, soft edges |
| User intent match | Often what people want to avoid | Closer to “without a blur box” |
On CleanVideoAI, the editor path is AI pixel fill—not a Gaussian blur box or mosaic mask. For a short product-side summary, see the homepage section without a blur box.
How AI reconstruction works
“Inpainting” is not a magic eraser button. In video watermark tools it usually means three linked stages—still with honest limits when the mark sits on hard content.
Detect / mark
You (or auto-detect) define where the watermark sits—position, shape, and roughly how opaque it is.
Read context over time
For video, nearby frames matter: motion, lighting, and what should naturally appear under the mark as the shot moves.
Rebuild pixels
The model fills the region with new pixels that match texture and color—aiming for a continuous scene, not a blurred stamp.
Why video is harder than a still
A photo is one frame. A video is many frames in time. If each frame is filled independently with no regard for motion, the repaired region can shimmer or “boil” during playback—even when a single freeze-frame looks fine.
That temporal problem is why modern video restoration cares about consistency across frames, not only spatial detail in one image. For a deeper technical dive (optical flow through spatiotemporal models), see the companion essay on the temporal consistency challenge (external deep dive).
When results look cleanest—and when to preview first
AI fill works best on uniform or low-detail backgrounds (sky, walls, smooth surfaces). Harder cases—faces, crowds, fast motion, busy textures—still beat a blur box for most social and client use, but may show slight repair marks under close inspection. Moving badges that jump position need a mask path that tracks the mark across time.
Usually cleaner
- Fixed corner logos and channel bugs
- Solid text on relatively simple backgrounds
- A tight mask with a thin margin—not half the frame
- Stock-style edge logos on calm backgrounds
Preview first
- Semi-transparent or see-through badges
- Busy motion or faces under the mark
- Large overlays—slight repair marks possible (still not a blur box)
- Marks that jump or rotate across frames
Fixed logo watermarks are often the cleanest case for AI fill. For honest expectation-setting on harder clips, see realistic quality limits on the homepage.
Try AI fill in 3 steps
Concept only here—the full click-by-click walkthrough lives in the free how-to.
Upload
Open the editor and upload a clip you own or may edit.
Mark the watermark
Draw a tight mask on the badge—not a blur rectangle over half the frame.
Preview, then export
Check a short sample for edges and flicker before a full export.
Step-by-step with screenshots: How to remove a video watermark free (upload → mark → preview → export) · or open the free editor now.
How to choose a tool
- Does it crop the corner, stamp a blur box, or use AI pixel fill?
- Can you run a short sample preview before a full export?
- Does the page explain realistic limits—or only promise perfect quality?
- Are you editing a clip you own or have the right to edit? Rights come first.
Ready for the full workflow? Follow the free how-to steps.
Frequently Asked Questions
Is AI watermark removal the same as blurring?
What does “without a blur box” mean?
Why do I still see marks after AI fill?
Crop vs blur vs AI—which should I use?
Should I preview before exporting?
Try AI fill—not a blur box
Mark the watermark on a clip you own or may edit, preview a sample, then export when it looks clean enough.